
How to Drain a Basement Dehumidifier Continuously (Step-by-Step)
Written by the Dehumidifier for Basement editorial team and reviewed for source accuracy. — last updated August 2026. Editorial policy
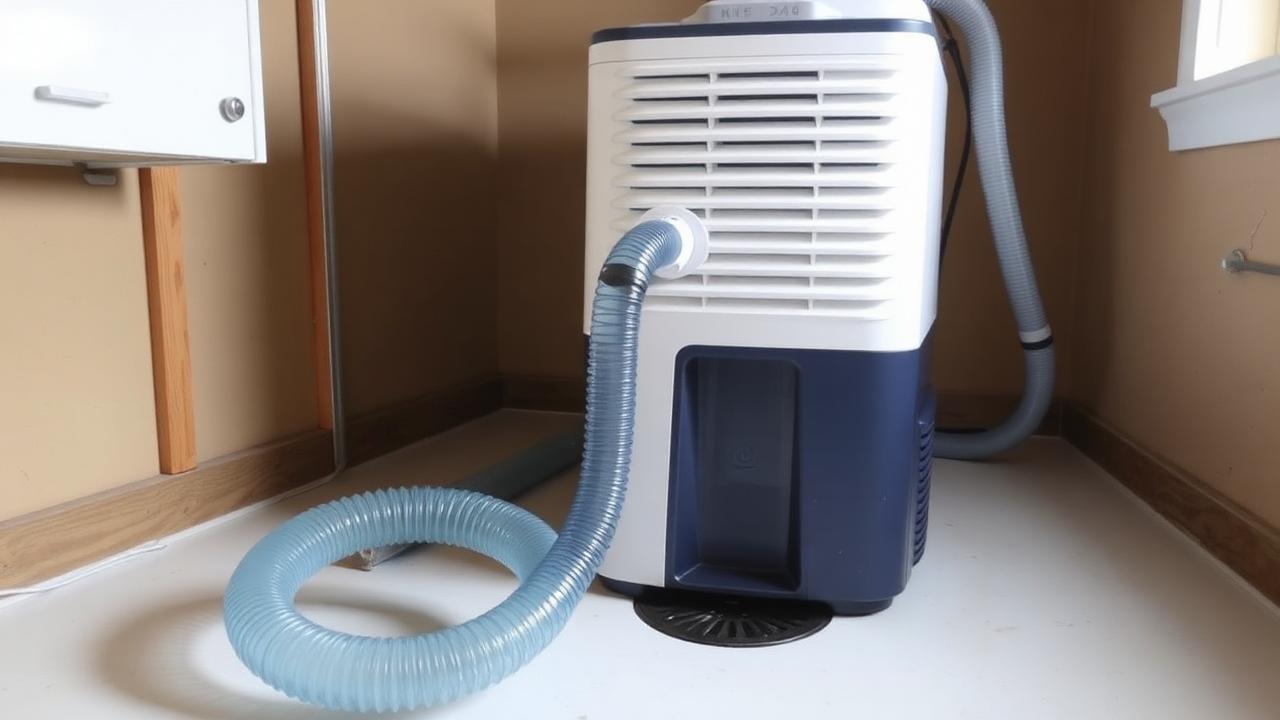
Quick answer
Bypass the bucket, connect a 3/4-inch garden-hose-thread line to the continuous drain port, and give it continuous downhill fall to a floor drain or sump. If the drain sits higher than the port, you need a condensate pump instead of gravity.
The bucket is the weakest part of any basement dehumidifier. A 50-pint unit in a damp August basement fills a 1.6-gallon reservoir in well under a day, and the moment it does, the machine shuts off. Two days later the humidity is back where it started. Continuous drainage removes that failure mode permanently, and on most units it takes fifteen minutes and costs less than a takeout lunch.
First, identify which drainage method your basement supports
| Your situation | Method | Typical parts cost |
|---|---|---|
| Floor drain or sump pit lower than the unit's drain port | Gravity drain | $10-$20 |
| Unit sits on the slab, drain is across the room but still lower | Gravity drain on a stand | $20-$40 |
| Only drain is a laundry sink or standpipe above the port | Condensate pump | $50-$90 |
| No drain anywhere in the basement | Condensate pump to an exterior or plumbing tie-in | $50-$90 + pro tie-in |
| Crawl space with no drain and no slope | Pump plus a professionally routed discharge | Contractor work |
Tools and parts
- 3/4-inch garden hose (vinyl or reinforced), cut to length — avoid coiled or kinked hose
- Hose washer and, on some models, a threaded adapter supplied in the box
- Level and tape measure
- Cinder blocks, a purpose-made stand or a shelf to raise the unit
- Zip ties or hose clamps to secure the run
- Optional: condensate pump with a 3/8-inch or 1/2-inch vinyl discharge tube and a safety float switch
Method 1: Gravity drain (step by step)
Tools needed
- 3/4-inch hose
- Level
- Cinder blocks or stand
- Hose washer
- 1Unplug the unit and remove the bucketPower down and pull the reservoir out. The continuous drain port is behind or beneath it — usually a threaded plastic spout with a rubber plug or a knockout cover.
- 2Find and open the continuous drain portRemove the plug and keep it; you will need it if you ever revert to bucket operation. Most ports are standard garden-hose thread (GHT). Some models require snapping out a plastic knockout inside the bucket cavity first.
- 3Confirm the internal reservoir bypassOn most units, attaching a hose automatically bypasses the full-bucket float switch. On a few, you must also reseat the empty bucket for the safety switch to read 'not full,' or flip a drain-mode option in the menu. Check the manual — a unit that keeps reporting 'bucket full' with a hose attached is almost always missing this step.
- 4Fit the hose with a washer and hand-tightenSeat a rubber hose washer in the coupling and hand-tighten only. Over-tightening cracks plastic ports. Do not use thread tape on GHT fittings — the washer makes the seal.
- 5Raise the dehumidifier if neededThe drain port must sit above the drain opening for the entire run. Two cinder blocks or a stand gives 8-16 inches of head, which is usually enough to reach a floor drain across the room. Keep the unit level side-to-side so the internal pan drains fully.
- 6Route the hose with continuous fallAim for at least 1/4 inch of drop per foot of run. Every low spot holds water, and standing water in the line breeds biofilm that eventually blocks it. Keep the run as short and straight as possible.
- 7Eliminate kinks and secure the lineA single kink behind the unit stops drainage completely and sends water out of the pan onto the floor. Zip-tie the hose along a wall or joist so it cannot be knocked loose or stepped on.
- 8Terminate above the drain, never submergedLeave an air gap: the hose end should sit above the floor drain grate or sump water line, not down inside it. A submerged end can siphon and can draw sewer gas back toward the unit.
- 9Test with water before you trust itPour a quart of water into the internal pan or run the unit for 30 minutes and watch the full path. Confirm water arrives at the drain and that nothing weeps at the coupling.
- 10Recheck in a weekLook for pooling under the unit, a damp coupling, or a hose that has shifted. Then flush the line with a cup of warm water and a splash of white vinegar every few months to keep biofilm from narrowing it.
Method 2: Condensate pump (when gravity won't work)
Find a licensed local specialist
We can't fix standing water or structural issues with an appliance — but we can connect you with someone who can.
Your ZIP code is stored securely so we can check licensed specialist availability in your area. We never sell your information to unsolicited marketers.
If the only drain is a laundry sink, a standpipe, or a tie-in above the dehumidifier's port, gravity is off the table. A condensate pump collects water in a small reservoir and pushes it upward — typically 15-20 feet of lift — through a narrow vinyl tube.
- Place the pump on the floor below the dehumidifier's drain port and run a short gravity hose from the unit into the pump's inlet.
- Connect the discharge tube to the pump outlet and route it up and over to the drain, securing it every few feet so it cannot sag or pull loose.
- Keep a small loop at the discharge end above the drain to break siphoning.
- Wire or connect the safety float switch. Every quality pump has one. It cuts the dehumidifier off (or triggers an alarm) if the pump fails, instead of letting the reservoir overflow onto the floor.
- Plug the pump into its own outlet — not a switched one, and not a shared circuit with the sump pump.
- Test by pouring water into the pump reservoir until it cycles, and watch the full discharge path for leaks.
- Clean the pump reservoir twice a year; slime buildup is the number one cause of failure.
Cold weather, freezing and other failure modes
- Never discharge outdoors in freezing climates. The line freezes, backs up, and the water ends up on your floor.
- Do not run a hose through an exterior wall to a spot where it can ice over the discharge.
- Watch for slab settlement. A floor drain that used to be the low point sometimes isn't anymore.
- Check for backflow from the sump. During heavy rain a high sump water level can back into a submerged hose end. Keep the air gap.
- Confirm your drain is legal for condensate. Some jurisdictions restrict condensate discharge to certain drains; a plumber can confirm in one visit.
Quick troubleshooting
| Symptom | Likely cause | Fix |
|---|---|---|
| Unit still says bucket full | Reservoir bypass not engaged | Reseat the empty bucket; enable drain mode in the menu |
| Water on the floor under the unit | Kink, low spot or loose coupling | Re-route with continuous fall; reseat the washer |
| Hose drips slowly, pan overflows | Biofilm restricting the line | Flush with warm water and vinegar; replace the hose |
| Pump runs constantly | Discharge blocked or check valve stuck | Clear the tube; clean or replace the check valve |
| Pump silent, reservoir full | Failed pump or tripped float | Replace the pump; verify the safety switch is wired |
Frequently asked questions
Can any dehumidifier drain continuously?+
Most basement-class units (30 pints and up) include a continuous drain port. Very small room units sometimes do not. Check for a threaded spout or knockout behind the bucket before you buy.
Does the hose need to be a special type?+
A standard 3/4-inch garden hose with garden-hose thread works on most units. Avoid thin coiled hose, which kinks. Shorter and straighter is always better.
How much slope does the drain hose need?+
At least 1/4 inch of fall per foot of run, continuously. Any section that flattens or rises will hold water and eventually block.
Can I drain into a sump pit?+
Yes, if the pit has a working pump and the hose ends above the water line with an air gap. Do not drain into a pit that only collects and does not discharge.
Do I need a condensate pump?+
Only when the drain point is higher than the dehumidifier's drain port, or too far away to keep continuous fall. Always choose a pump with a safety float switch.
What if my basement has no drain at all?+
That is the case where improvised runs cause flooding. A pump discharging to a plumbing tie-in or an approved exterior point is the usual answer, and the discharge location should be chosen by a local waterproofing or plumbing professional.
Keep reading
Sources and methodology
Guidance on this page is drawn from federal agencies and industry standards bodies rather than our own laboratory testing. We do not test appliances in a laboratory and we do not publish product measurements we did not obtain from the manufacturer or a government listing.
- U.S. Environmental Protection Agency — Mold Course & moisture control guidance (keep indoor relative humidity 30–50%)Used for: Target indoor relative humidity range and mold-growth conditions. Last verified 2026-07-29.
- U.S. Department of Energy — Energy Conservation Standards and Test Procedure for DehumidifiersUsed for: Why capacity ratings changed: the current federal test procedure and its rating conditions. Last verified 2026-07-29.
- ENERGY STAR (EPA) — ENERGY STAR Certified Dehumidifiers product finderUsed for: Certification status, Integrated Energy Factor (IEF) values, and sizing guidance for dehumidifiers. Last verified 2026-07-29.
- Association of Home Appliance Manufacturers (AHAM) — Dehumidifier certification program and sizing guidanceUsed for: Capacity-by-condition sizing ranges and certified capacity verification. Last verified 2026-07-29.
- U.S. Energy Information Administration — Electric Power Monthly — average retail price of electricity, residential sectorUsed for: Default electricity rate used in operating-cost estimates. Last verified 2026-07-29.
Written by the Dehumidifier for Basement editorial team and reviewed for source accuracy. Last updated August 2026. Found an error? Report it through our corrections policy.